IPbuILd SID
The product:
ipbuild SID is a configuration tool designed to be used by engineers, electricians or installers. It’s a niche product aimed to make interactions between databases, probes and automations easier and quicker to settle. After initial configuration, the system becomes a versatile diagnostic tool for routine checks.
PROJECT OVERVIEW
The product:
ipbuild SID is a configuration tool designed to be used by engineers, electricians or installers. It’s a niche product aimed to make interactions between databases, probes and automations easier and quicker to settle. After initial configuration, the system becomes a versatile diagnostic tool for routine checks.
Project duration:
March 2021 to December 2022
The problem:
Making a first installation of a home automation system easy to integrate with a whole compound of electrical and mechanical probes and actuators.
The goal:
Being able to provide an easy first configuration and characterization of the hardware bought by the client for their facility.
My role:
UX designer for the desktop web App interface
Responsibilities:
Conducting competitive audits, making paper and digital wireframing, low and high-fidelity prototyping, providing usability studies, accounting for accessibility, and iterating on designs.
User research:
I conducted surveys and created empathy maps to better understand how a technician could use this set-up profitably. My study considered both high specialized pro users and maintenance employees. They proved to be concerned about the learning curve necessary to use this tool and the detail of the configuration settings.
UNDERSTANDING THE USER
User research:
I conducted surveys and created empathy maps to better understand how a technician could use this set-up profitably. My study considered both high specialized pro users and maintenance employees. They proved to be concerned about the learning curve necessary to use this tool and the detail of the configuration settings.
Identification components
PAIN POINTS
Identification components
Not being able to name components or label modules and automations.
1 Complex pairing software-module
Not being able to change automation-module pairing by software and be forced to add new wiring (flexible back-end configuration).
2 Replacing modules
Routine checks of the hardware system (not being able to pause modules of the automation system without turning off everything else).
3PERSONAS

Goals
1) Not wasting his time learning a complex configuration software
2) Having quick and productive configuration sessions (of hardware and software)
3) Easy maintenance even for bigger locations

Frustrations
1) Switching OFF the entire system to change or upgrade components
2) Not having a plug and play set up ready for different clients
3) Loss of time and money for complex configurations
Goals
1) Not wasting his time learning a complex configuration software
2) Having quick and productive configuration sessions (of hardware and software)
3) Easy maintenance even for bigger locations
Frustration
1) Switching OFF the entire system to change or upgrade components
2) Not having a plug and play set up ready for different clients
3) Loss of time and money for complex configurations

Kenneth’s demographics
Age: 32
Education: High-school degree
Hometown: Chicago, IL
Family: his girlfriend, Tina
Occupation: Contractor, electrical technician

Problem statement
Kenneth is a young contractor who focused his business in automation systems. He needs an easy and quick way to manage installations and routine checks because he wants to optimise his workflow and his time.
Kenneth Baker


Becky’s demographics
Age: 32
Education: High-school degree
Hometown: Chicago, IL
Family: his girlfriend, Tina
Occupation: Contractor, electrical technician
Problem statement
Kenneth is a young contractor who focused his business in automation systems. He needs an easy and quick way to manage installations and routine checks because he wants to optimise his workflow and his time.
Goals
1) Easy and quick training for his employees
2) Managing different locations in different places from the same control room
3) Scalable technology for smaller and bigger warehouses
Frustrations
1) Spending too much time managing different teams
2) Not being able to stop the production in order to upgrade
3) Storage spaces needs frequent environment adjustments
Goals
1) Easy and quick training for his employees
2) Managing different locations in different places from the same control room
3) Having access to an high level of customization in terms of scenarios
Frustration
1) Spending too much time managing different teams
2) Not being able to stop the production in order to upgrade
3) Storage spaces needs frequent environment adjustments
Lucas’s demographics
Age: 45
Education: Master of Science - Mechanical Engineering
Hometown: Detroit, MI
Family: his wife Luisa, Mark and Beth (son and daughter)
Occupation: Production and storage manager
Problem statement
Lucas is a brilliant engineer and a successful manager who needs to upgrade his company’s automation system because he wants to optimize storage spaces and manage each warehouse accordingly.
Lucas Hopkins


James’s demographics
Age: 45
Education: Master of Science - Mechanical Engineering
Hometown: Detroit, MI
Family: his wife Luisa, Mark and Beth (son and daughter)
Occupation: Production and storage manager
Problem statement
Lucas is a brilliant engineer and a successful manager who needs to upgrade his company’s automation system because he wants to optimize storage spaces and manage each warehouse accordingly.
Persona: Kenneth Baker
Goal: Switching off and changing a malfunctioning module from remote without turning down everything else.
Note:Modularity of the automation system has to be ensured in each one of the routine checks.
JOURNEY MAPS
Kenneth’s journey map
Tap to download Kenneth’s journey map in PDF

Lucas’s journey map
Tap to download Lucas’s journey map in PDF
ACTION
Select a combination of client and building
Select a module
Turn down the module
Select “added modules” on the menu
Configure the new module
TASKS LIST
1. Access the web app with your credentials
2. Select a client
3. Select on of the buildings paired with the client
1. Reach the homepage
2. Find the right module through its serial number
3. Check position, status, and last keep alive
1. “Inspect” the module by clicking on the related icon
2. Turn OFF the module with the toggle switch
1. Select “Added modules” on the side menu
2. Scroll the list 3. Add the new module
1. Fill the blank spaces with the new IN or OUT door informations
2. Save changes
FEELING ADJECTIVE
• Unsure if the client’s facility chosen is the right one
• Reassured by the presence of a red dot on the module to change
• Pleased about the presence of a recognizable power ON-OFF switch
• Satisfied by working with a plug and play system
• Relieved to be able to save so much time
IMPROVEMENT OPPORTUNITIES
• Providing a brief description about each site and clearly displaying the client’s name
• Adding an ON-OFF label near the status dot
• Adding a confirmation pop-up before disconnecting the module from the system
• Adding an ON-OFF label for the status of each module (even if not yet connected to the system)
• Providing a confirmation interaction to complete the procedure
Persona: Lucas Hopkins
Goal:Changing the modules and automation configuration at any given time.
Note:Being able to add custom informations to characterize each component.
ACTION
Select a combination of client and building
Select a module
Land on the module info page
Check the previous configuration
Change the configuration, pairing or info
TASKS LIST
1. Access the web app with your credentials
2. Select a client
3. Select one of the buildings paired with the client
1. Scroll the home page
2. Find the right module through its serial number
3. Check position, status, and last keep alive
1. Click on the arrow on the left side of the module’s info-row
2. Choose a IN or OUT door
1. Scroll through previous pairings
2. Delete or modify the previous configuration
3. Pair new element
1. Fill the blank spaces with the new IN or OUT door informations
2. Check the list for any mistakes
3. Save changes
FEELING ADJECTIVE
• Doubtful about choosing the right combination of client and building
• Reassured by the presence of a serial number on each module
• Feeling guided to a specific setting
• Satisfaction from being able to switch configuration quickly
• Relieved to be able to save a lot of time
IMPROVEMENT OPPORTUNITIES
• Providing a brief description of each site and clearly displaying client’s name
• A search function could be added to speed up the process
• Adding the position of every single IN or OUT could help prevent mistakes
• An info box to write down information should be provided
• Providing a confirmation interaction to complete the procedure
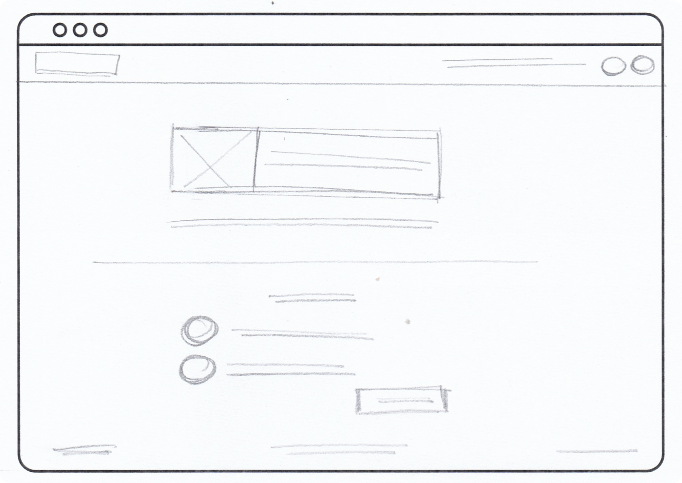
Developing ideas:
Taking the time to draft iterations of each screen of the app on paper ensured that the elements that made it to digital wireframes would be well-suited to address the users’ needs.
PAPER WIREFRAMES
Developing ideas:
Taking the time to draft iterations of each screen of the app on paper ensured that the elements that made it to digital wireframes would be well-suited to address the users’ needs.

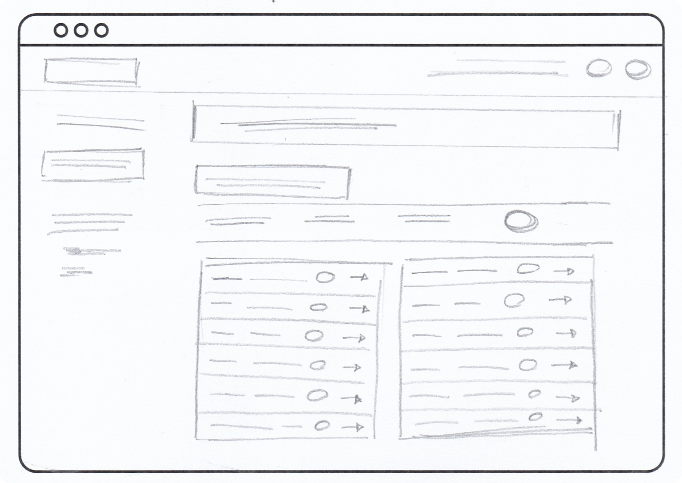
Refining ideas:
As the project developed more depth, I committed to a certain design language and started to add some refined workflow between pages.
DIGITAL WIREFRAMES
Refining ideas:
As the project developed more depth, I committed to a certain design language and started to add some refined workflow between pages.

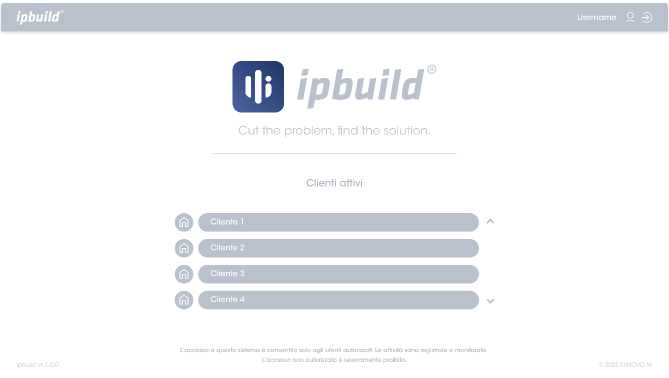
• Username and profile features (logout). A list of clients is paired to each installer. Every account is protected by a password and two-factor identification.
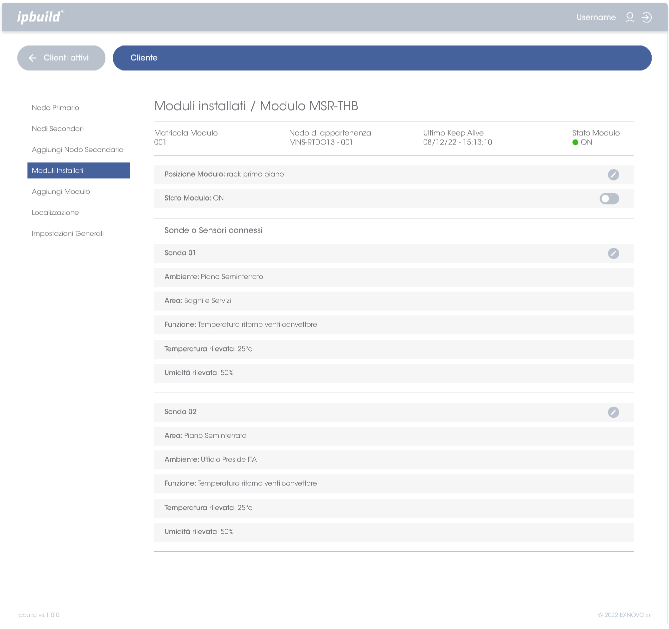
• Labels connected with an account, reporting name and location of each facility
• Logo and claim to establish a clear brand identity
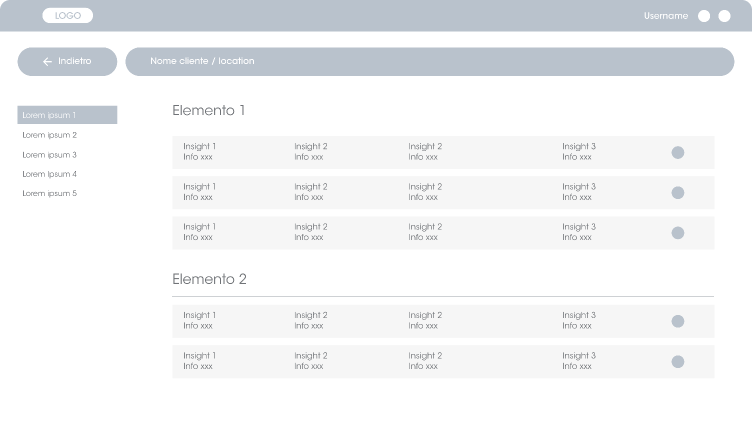
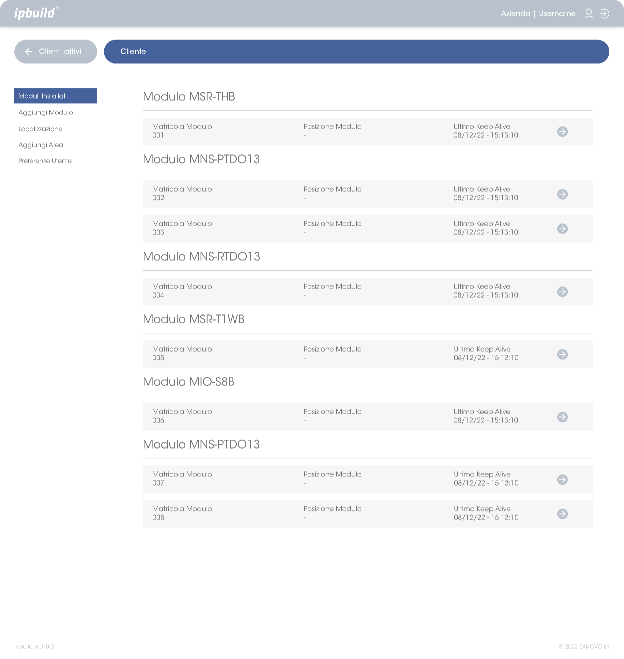
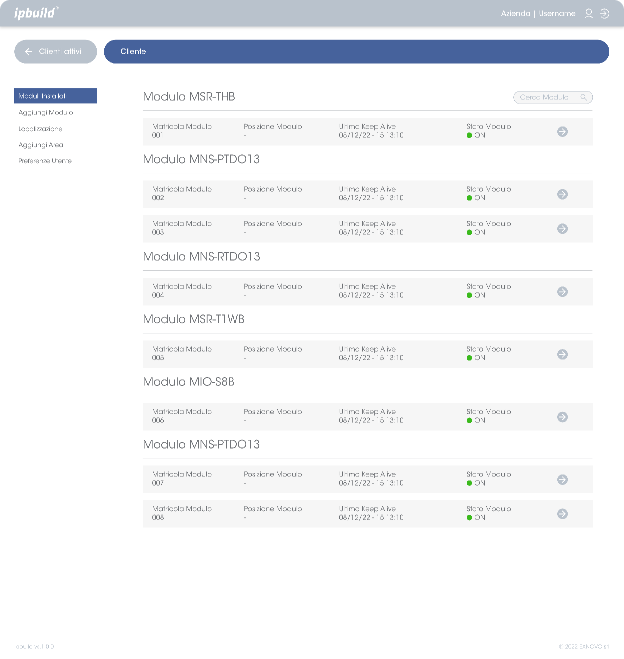
• Showing on the home page a list of modules installed organized by type. The most important insights about position and state are displayed as well.
• The side menu is where all the basic and more advanced functions are organized.
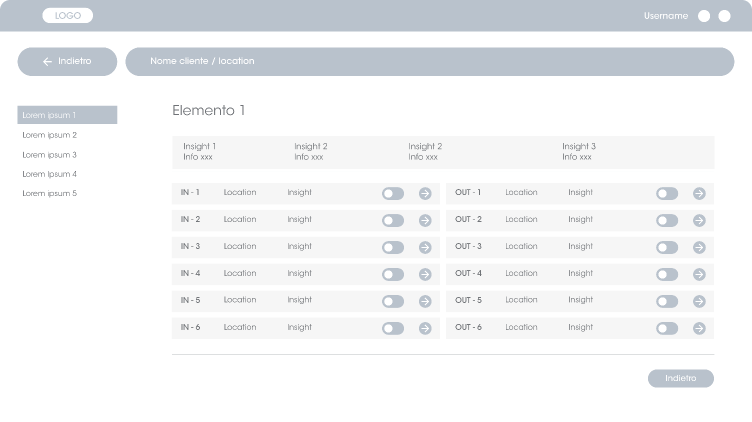
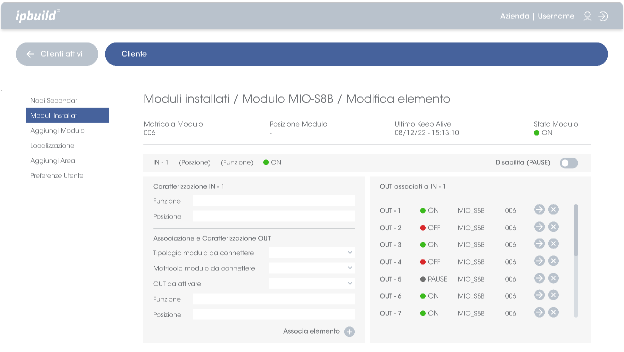
• By clicking on one of the modules all the INs and OUTs doors are displayed. Toggle switches and locations allow quick interactions
• Each of the infographics can be added to the dashboard or exported
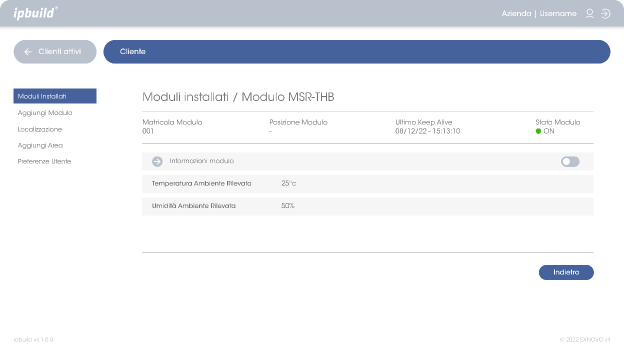
• By interacting with the arrow icon it’s possible to access a deeper level of information and customization.
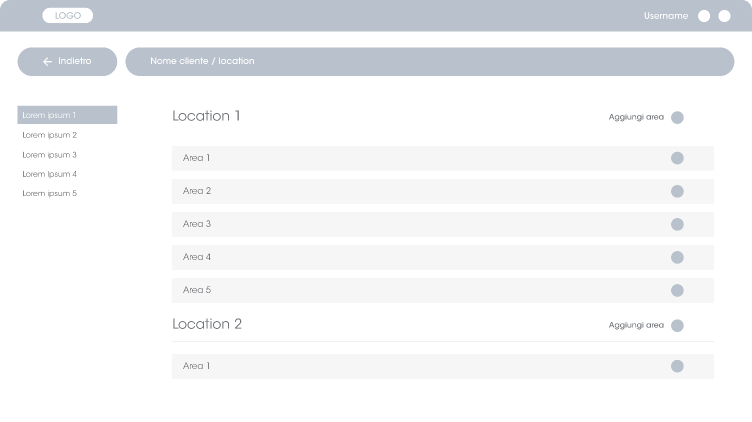
• Each facility can be characterized according to the customer preferences and grouped by areas and locations.
Username and profile features (logout). A list of clients is paired to each installer. Every account is protected by a password and two-factor identification.
Showing on the home page a list of modules installed organized by type. The most important insights about position and state are displayed as well.
Labels connected with an account, reporting name and location of each facility
Logo and claim to establish a clear brand identity
The side menu is where all the basic and more advanced functions are organized.
By clicking on one of the modules all the INs and OUTs doors are displayed. Toggle switches and locations allow quick interactions
Each of the infographics can be added to the dashboard or exported
By interacting with the arrow icon it’s possible to access a deeper level of information and customization.
Each facility can be characterized according to the customer preferences and grouped by areas and locations.
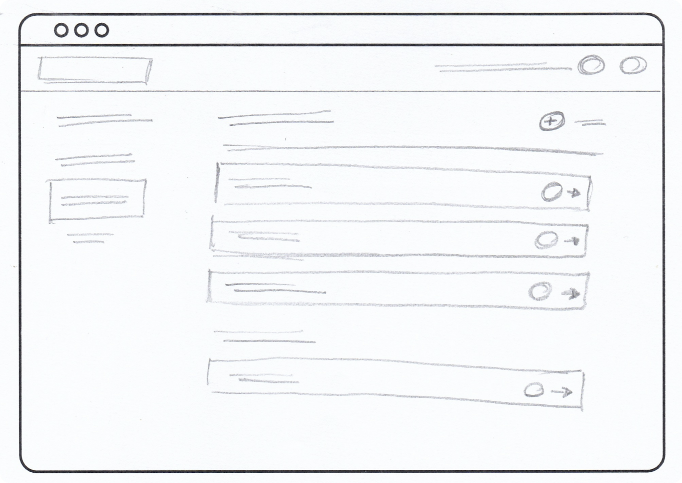
Prototyping:
The low-fidelity prototype connected the primary user flow from logging into the scenarios’ customization process and insights display
LOW-FIDELITY PROTOTYPE

Findings:
I conducted two rounds of usability studies. Findings from the first study helped guide the designs from wireframes to mockups. The second study used a high-fidelity prototype and revealed what aspects of the mockups needed refining.
USABILITY STUDY
Findings:
I conducted two rounds of usability studies. Findings from the first study helped guide the designs from wireframes to mockups. The second study used a high-fidelity prototype and revealed what aspects of the mockups needed refining.
First round insights
Add a confirmation before disconnecting a module
1Pair every module with an ON-OFF label
2Add info about the client’s facility
3 Second round insights
Add a description (function and position) for INs and OUTs
1Add a search function to speed up the process of locating a module
2 Iteration 1:
Early designs allowed for some insight concerning the customization, but after the usability studies, I added additional informations about status..
MOCK-UPS
Iteration 1:
Early designs allowed for some insight concerning the customization, but after the usability studies, I added additional informations about status.
Before usability study

After usability study

Before usability study

After usability study
Iteration 2:
After the first round of usability tests, I added more custumization settings to label modules and organize them by function and position.
Before usability study
After usability study
Before usability study
After usability study
Iteration 3:
After the second round of usability tests, I improved further the the organization of the modules installed further and added a search feature with filters to speed up the identification and pairing of modules and functions.
Before usability study

After usability study
Before usability study
After usability study


Tutorial guide
ACCESSIBILITY CONSIDERATIONS
Tutorial guide
Provided a tutorial mode in the menu to teach main features and basic functions.
1 Coherent language and design
Icons, labels, mouse-overs and language used is coherent with the ipbuild product ecosystem.
2 Homepage - Dashboard
To ensure a better and more secure experience for each type of user a two-factor identification should be added.
3TAKEAWAYS

Impact
Designing this desktop app and the interactions necessary to connect a set of physical products dislocated in the client’s facility with the configuration system refined my knowledge on how important it is to have real life experience on this type of problems

What I learned
This project taught me the importance of doing proper research about the proper user base. Experienced technicians, installers and electricians have a clear vision about what could make the service provided better and faster to set-up and maintain.
Impact
Designing this desktop app and the interactions necessary to connect a set of physical products dislocated in the client’s facility with the configuration system refined my knowledge on how important it is to have real life experience on this type of problems.
What I learned
This project taught me the importance of doing proper research about the proper user base. Experienced technicians, installers and electricians have a clear vision about what could make the service provided better and faster to set-up and maintain.
NEXT STEPS

Next usability studies
Conduct another round of usability studies to validate whether the pain points users have experienced have been effectively addressed.

Further area of interest
Conduct more user research to determine possibile new areas of need.
Next usability studies
Conduct another round of usability studies to validate whether the pain points users have experienced have been effectively addressed.


